
Note: This is not a guide for taking your Steam Deck apart and is more an example of what not to do. Always use the right tools for the right job and seek out professional repair if you’re not confident in your skills.
I am a neurotic woman. If something is bothering me, it needs to be addressed right. now. It doesn’t matter if it’s the right time to do it or if I have the necessary resources. So when my Steam Deck’s B button started getting stuck…well, what was the answer? Take the damn thing apart, of course.
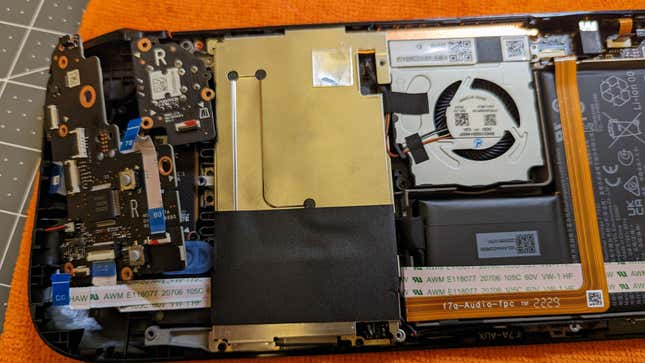
The Steam Deck impressed early on with not just impressive game-playing power for something so small, but also, as demonstrated by Valve, user-friendly construction with modular components. This makes the Deck one of the most hacker- and repair-friendly gaming devices currently available. And after finally opening it up myself, I’m convinced every expensive gaming device ought to be designed to such a high standard of user-friendly repairability.
Taking things apart is standard for me
Once I suspected there was a problem with my B button I turned to the internet for answers and, surprise, it’s a common issue. There are a few fixes for this problem that don’t involve cracking the deck open, such as using fine-grit sandpaper or a small piece of tape. But after reading about this particular B-button issue, which comes from a manufacturing oversight in the system’s plastic shell, I was convinced something different was plaguing mine.
Read More: Valve Made Steam Deck Easy To Mod And Repair, And It’s Starting To Pay Off
Too many hours playing at Halo LAN parties with gamepads way too close to fast food and bottles of Mountain Dew have taught me what this very specific stuck feeling is. My immediate thought was, “someone needs to learn to stop eating at her goddamn desk while working on Steam Deck articles.”
This wasn’t my first rodeo. I’ve built PCs, completely disassembled and reassembled laptops, consoles, and gamepads. I regularly repair and put together guitars, including soldering electronics, neck adjustment, and even fretwork on occasion, and have performed avant garde mods with mirrored glass inspired by the work of Ned Evett. I’ve got my success stories as well as failures. I had this. Right?
I almost made a critical mistake when cracking the device open
I made a deal with myself: I’d finish my playthrough of Metal Storm, 1991’s rockin’ shooty gravity-flipping NES platformer, then take this thing apart. And I made peace with the knowledge that I might destroy my Deck in the process…because I ain’t got the right tools for this job.
I drained the battery with The Witcher 3, then put the Deck into battery storage mode via the BIOS. This disables the power button and makes it so that it only turns on when the charger is plugged in. The internet states it’s essential prior to disassembly.
Read More: 11+ Great Steam Deck Games That Won’t Drain Your Battery
Disaster struck almost immediately. I unscrewed the eight screws on the back and was ready to pry it open….and then spotted my microSD card still in the slot, which you need to remove before opening the case or you will snap the card in half.
So I took that out.
I hate prying things open with my nails, but I don’t own any iFixit tools. Thus I used a resource I have in abundance, on floors, under cabinets, in random pockets: guitar picks.
I went with my current standard of Dunlop Tortex Flow picks at .83mm. As I Iearned, this is a great way to scratch and chew up the Deck’s plastic seams to the point that it now looks like someone’s been “in there” (it’s been reliced, thank you very much). I learned that a .50mm guitar pick is a bit kinder to the plastic, though it bears repeating: You should not open your Steam Deck like this.
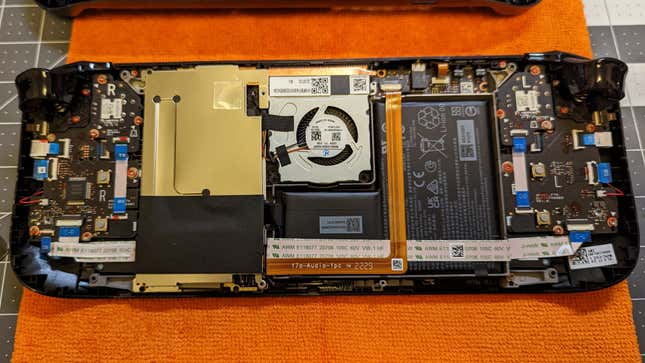
Once opened, I gazed upon my archnemeses: ribbon cables.
I don’t really know what my issue is with them, or what their issue is with me, but ribbon cables give me anxiety.
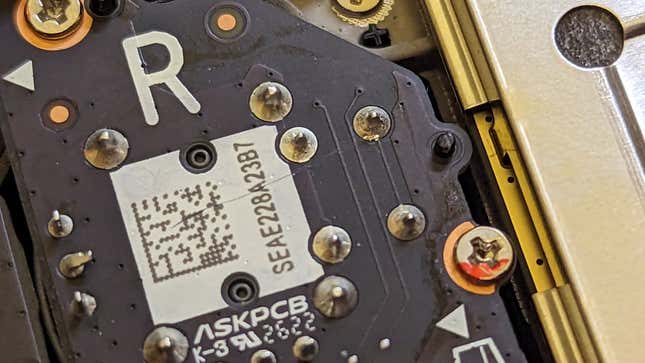
To get to the buttons, I’d need to disconnect several ribbon cables, remove two circuit boards, the trigger, and the bumper. Also, every YouTube channel told me to remove the shield, disconnect the battery, and probably wear a grounding bracelet. I decided not to do those last three because I didn’t want to. (Reminder: This is not a guide.)
That all went surprisingly well. But the L2/R2 trigger assembly was tricky. You need to pry it off its plastic hinges (one actual tip: remove the spring first) with a certain amount of force that will lead your brain to warn you: Stop, you are going to break this.
I stuck some electronics tweezers in there and pulled. This is what’s known as a brilliant fucking idea™.
The tweezers slipped out and tore a scratch across the thumbstick module, nicking a solder joint. But I have a soldering iron; I could fix that. Also, you can buy Deck analog stick modules separately. And was I gonna stop there? No. That B button needed to be fixed.
I got through everything else and finally excavated the buttons under the bumper mechanism and, yup, there on the B button was some…gunk? Crap? Stuff? A bit of alcohol did away with it and I started reassembly.
Reassembling the trigger sucks, by the way. I ended up resorting to clipping off a stick of abalone guitar binding material to push the spring in correctly. I only dropped the spring once, which took mere moments to find with my phone’s flashlight.
Time for reassembly…but hold on a minute
Snapping the case on, I reached for the screws and realized…I never reconnected those ribbon cables. (See? My ultimate enemy.) So, uh, back to prying the Deck open with a guitar pick.
After reconnecting the cables, snapping the shell back together, and replacing the screws, it was time to stick the power cable back in to see whether I bricked it or broke something.
My Steam Deck exploded, not with kinetic energy but with joy, powering on and letting me launch Halo so I could make sure my damage to the solder joint on the right analog stick wasn’t actually breaking anything (and I’m fairly confident that scratch could just be melted out, anyway).
As I delightedly hopped around murdering Covenant, I realized the Deck felt very different in my hands. Not physically, but…emotionally, maybe?
Having cracked the thing open, seen what’s actually in there, and removed a chunk of parts to get to a front-facing mechanism made the Deck feel less precious, and me feel more confident in my ability to keep this thing working throughout its lifespan. Previously, it was like any other black box of a consumer electronics device, like my phone, or my Switch. Now? I know firsthand that the Deck is a user-serviceable device, so I won’t feel weird about opening it again. Just…maybe I’ll buy a couple of proper tools next time.
My B button still gets stuck, by the way. But not in that gross sticky way, just a clicky plasticky way that matches the descriptions of what many other Steam Deck users are dealing with. Time to get some sandpaper.